

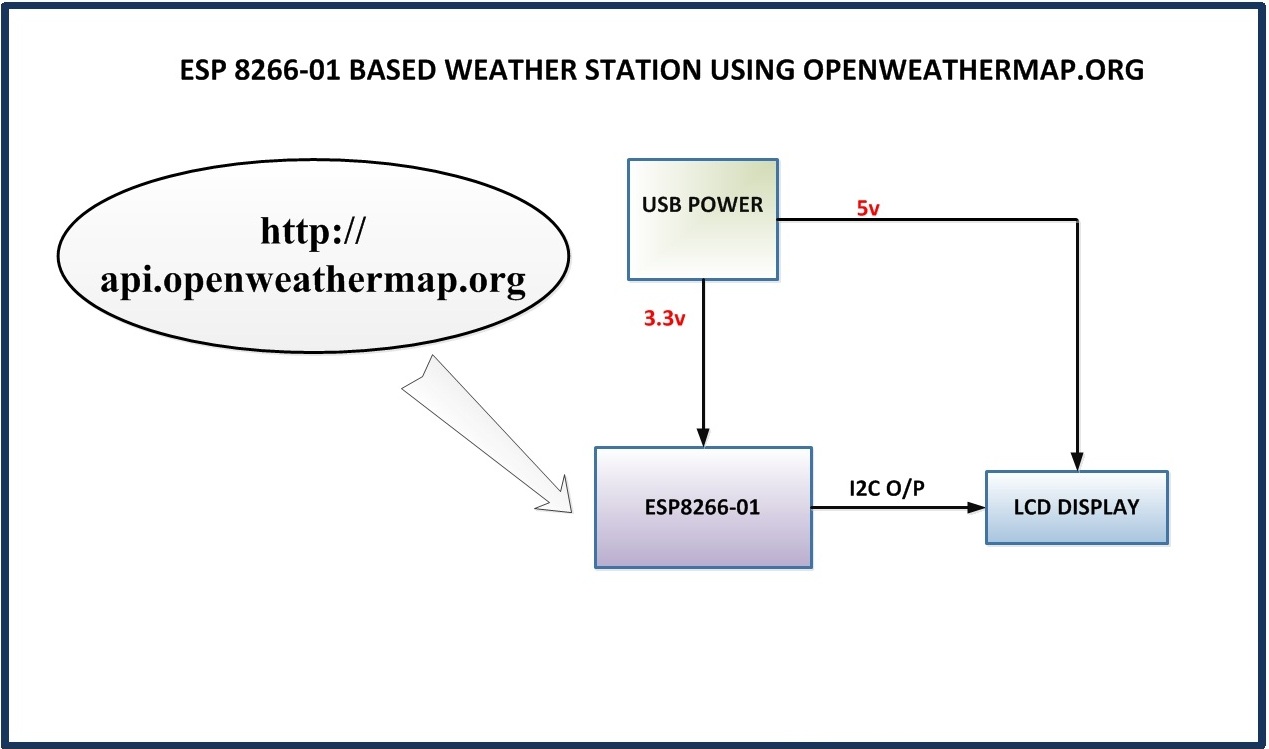
Real-time weather data monitoring is a project in which we will monitor humidity, temperature, cloud condition, atmospheric pressure, and many other parameters. In this project, we will interface I2C LCD with the ESP8266-01 module and communicate with an open-to-use website to fetch all the weather data in JSON format and display it on the 16x2 LCD.
This project can be named a weather forecasting project if you fetch the next weather data and display it on the I2C LCD module.
You must have an account with api.openweathermap.org website to get the data to create your account and set up all the details please follow the YouTube tutorial HERE.
Hardware Requirements:
- ESP8266-01 module
- USB to TTL converter (FTDI Module recommended)
- 16x2 LCD
- I2C LCD module or PCF8574P (How to interface PCF8574P with LCD HERE)
- Some connecting wires.
- Small breadboard
Software Requirements:
- Arduino IDE (You can download it from HERE).
- Arduino I2C LCD Library (Download if from HERE)
- WIRE Library (inbuilt within the IDE).
- Need to download ESP8266 boards from the board manager
How to download ESP boards in Arduino IDE:
STEP 1: copy these links ( https://dl.espressif.com/dl/package_esp32_index.json, http://arduino.esp8266.com/stable/package_esp8266com_index.json )
Got to file -> preferences -> Additional board manager URLs paste the link in the space provide and click ok.
Please follow the below steps and complete the installation process.


After completing installation you can check the boards in the board manager tab.

Block diagram: This block diagram shows how the flow of the process will work and complete the project.
Complete Circuit diagram:

PCF8574P and 16x2 alphanumeric LCD connection table:
| PCF8574P | 16x2 LCD |
| 1, 2, 3 and 8 | GND |
| 4, 5, 6 and 7 | D4, D5, D6 and D7 respectively |
| 11, 10 and 9 | RS, RW, and E respectively |
| 12 and 13 | Not connected |
| 14 and 15 | SDA and SCL of Arduino |
| 16 | 5v DC |
ESP8266-01 and PCF8574P connection table
| ESP8266-01 | PCF8574P |
| GPIO2 (SDA) | PIN15 (SDA) |
| GPIO0(SCL) | PIN16(SCL) |
If you are using I2C LCD as I have used in my YouTube video follow the below connection table
| ESP8266-01 | PCF8574P |
| GPIO2 (SDA) | SDA |
| GPIO0(SCL) | SCL |
Please follow the circuit diagram and the table given without making any connection errors to get the best result.
Code Explanation:
First, we need to add the libraries which we will use in this project. ArduinoJson library is used to extract JSON data fetched from the OpenWeatherMap website, LiquidCrystal_I2C is used for I2C LCD display, WIRE library is the helping library for I2C LCD library, and ESP8266WiFi library is used for ESP functionality.
#include "ESP8266WiFi.h"#include "ArduinoJson.h"
#include "LiquidCrystal_I2C.h"
#include "Wire.h"The below piece of code is used to define objects for the respective constructor to get the data from the library. Like a client and LCD are the objects of the respective constructor in the respective library. Lcd object is passed with three variables, the first variable is the address of the I2C LCD for more information follow the previous tutorial HERE, second and third variables are the type of LCD we are using like we are using 16x2 LCD, that’s why here we have mentioned 16,2.
WiFiClient client;
WiFiClientSecure sclient;
LiquidCrystal_I2C lcd(0x3F,16,2);
Again the below piece of code is the variables define to store the data extracted from the OpenWeatherMap website using the ArduinoJson library.
String weatherMain = "";
String weatherDescription = "";
String weatherLocation = "";
String country;
int humidity;
int pressure;
int temp;
int tempMin, tempMax;
int clouds;
int windSpeed;
String weatherString;
char tempT[5],tempMinT[5],tempMaxT[5];
char humi[5],presS[5],cloudS[5],WindSpeed[5];
Then we need to define the most important part of our code where we define the SSID, SSID PASSWORD, API KEY, and the language we want to use.
const char* ssid     = "YOUR_WIFI_SSID";      // SSID of local network
const char* password = "YOUR_WIFI_PASSWORD";    // Password on network
String weatherKey  = "YOUR_API_KEY";   // openweathermap.org key
String weatherLang = "&lang=en";  //  english or other language
The below code is used to make arrows in an upward and downward directions using LCD custom character coding.
byte up[8] = {
                      0b00100,
                      0b01110,
                      0b10101,
                      0b00100,
                      0b00100,
                      0b00100,
                      0b00100,
                      0b00000
                    };
  byte down[8] = {
                        0b00000,
                        0b00100,
                        0b00100,
                        0b00100,
                        0b00100,
                        0b10101,
                        0b01110,
                        0b00100
                      };
Download the complete source code: click here
Video Tutorial:


0 Comments
Please do not enter any spam link in the comment box.